Love
Explosion Box card
Hi Crafters,
Today I will be taking you to a journey full of love and
commitment. I am celebrating love and bond of trust with my anniversary
explosion box card.
This card is full of layers just like layers of love which
keep on increasing with your experience in love. This card celebrates
anniversaries of love birds.
This design of explosion box card is my first entry to this
blog. So be ready to follow the steps and make your own explosion box card and
let me know how it was for you.
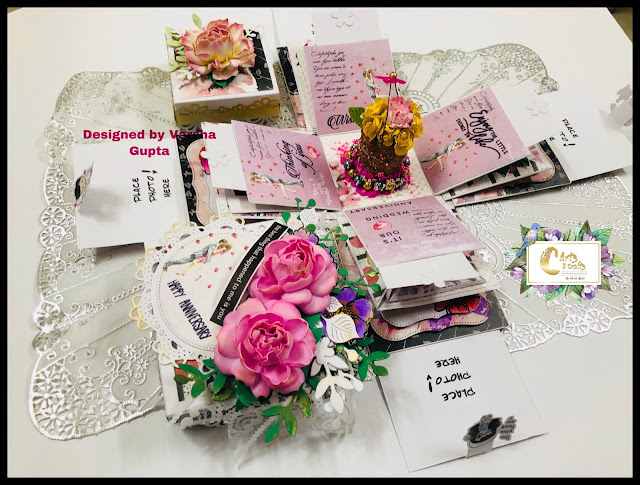
Here is my card:
Supplies Used:
From Crafters corner (online craft store)
1. You n I paper pack from
Bob n betty
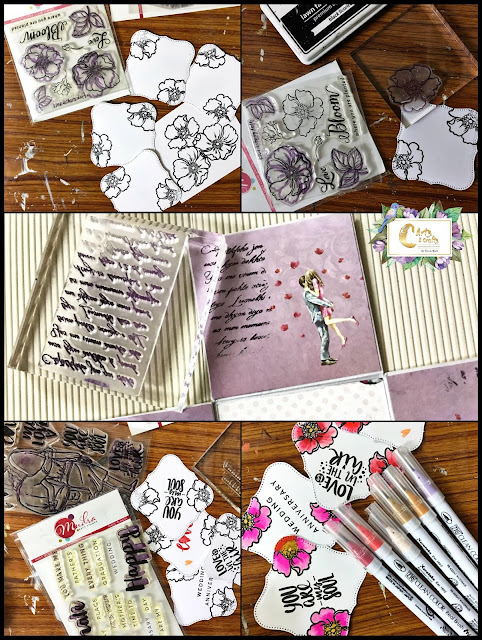
2.Mudra stamps - Fancy Flourish - Stamp
Leaves - Stamp
Beautiful Butterflies
Sweet Couple - Stamp
Wild Rose - Stamp
Place
Photo Here
Purely
Sentiment
Old
Script stamp
3. Spellbinder die -Circle
Delight - Die
4. We R Trim & Score
Board 12"X12"
5. Lawn fawn fawndamentals
black die ink pad
6. Metallique Brass
Hardware - Acrylic Paint 1.7oz
7. Dress My Craft- Flower
Pearls - Pack of 6 Colors
From Isty Bitsy online Store
1.Handmade flowers- Curly
rose, Pink
2.Tinted metallic golden
paint
3.White lace
4.Dies - Thin Cut Dies -
Tropical Fern
5.Thin Cut Dies - Blooming
Wreath
6. Gloss gel medium
From Amazon
1. Zig clean clear water brush pen
From Alibaba online store
1. Couple Stickers
2. Yellow paper flowers
3. Circle die
4. Couple die
5. Leave dies
6. Stitched square frame frilly
From Craft Junction (Local Shop in Vapi)
1. Fancy border punch
2.Tubby Craft Dye inks
3. Stamp- Happy Anniversary
From Lacal Craft store & Stationery
1. Foam Flowers from
Creative crafts
2. Fevicol MR
3. Glue gun and sticks
4. White ivory sheet 280
gsm
5. Brush
6. Scissors
So let's start.....
Step 1: First take a sheet (of any color, however I took
white) of 12x12 inches and score 4inches from each side. Repeat the scoring of
3.5 inches on each side over 10.5x10.5 inches sheet and 3 inches on each side
over 9x9 inches sheet.
Step 2: For each layer of sheet I cut the scored corner from
one side to flip it over the middle portion to make a pocket.
 |
| 2nd layer cutting for side pockets |
Step 3: I pasted You n I pattern paper from Bob n Betty as
shown in below picture.
 |
| Step 3 |
Step 4: I also used Mudra stamps for designing different layer
of explosion box card. The stamp I used to design this card are shown in below
picture.
 |
| Mudra Stamps |
Step 5: For the cover of the boxes I took 5x5 inches and 6x6 inches of papers and scored both at 1 inch from each side and then I designed the cover or cap of the card with different elements.
 |
| Elements |
Step 6: Below is the picture for my finished product.
 |
| Explosion Box |
 |
| Card View |
 |
| First layer |
 |
| embellishments |
 |
| Full view |


hey Varsha, Your creations are just awesome....lovely project done...and thank you for sharing your project for our ongoing blog challenge... "Anything Goes- Popped Up"
ReplyDeleteHey Priyanka,
DeleteThanks for your encouraging words.
Lot of love n hug
Varsha Gupta
Stunning explosion box. For our challenge I believe you have used the dies, pink and flowers, fabulous. Thanks for joining us at ‘Do-Al(l) Creatives’. Jonnece DT
ReplyDeleteHi Jonnece, thank you for your fabulous comment I truly appreciate. Yes you have identified it correctly.
DeleteThank again
That's an awesome make! But I can't see the link to DAK!!!! Please do this…
ReplyDeleteThanks for playing along with our Do-Al(l) Kreatives Challenge and good luck!
Hugs and please come back soon!
Doris
Kleido’s BastelStüble
*Owner* Do-Al(l) Kreatives (#21 – Bingo)
*DT* Die Traumfabrik
Hello Doris,
Deletethank you for your fabulous comment. I linked back to the challenge.. thanks for reminding me...
Thanks again
Wow, what a beautiful box.
ReplyDeleteThanks for joining us at the DAK Challenge.
Greetings Andrea
Hello,
DeleteThank you for fabulous comment.
Great job, very nice project.
ReplyDeleteThanks for your lovely comment
Delete